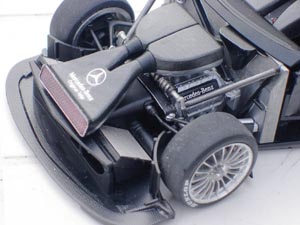
Shown
here is the complete engine. The topside of the air intake is done with kevlar
decal and the underside with silver. Nothing extra like wiring and plumbing
because the hood is so beautiful done by Tamiya that the car will only be shown
with the hood on the car.
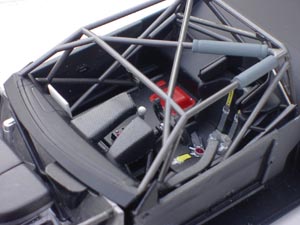
For
the interior I used a bit of klevlar decal only for the steering column and
for the air coolers in the middle of the dashboard and at the arm rest. Painting
is done as shown in the drawings.
For the safety belts I used the decals. Lazy building? Yup, but notice that
you can't see the safety belts when the car is 'closed' because of the very
deep seat. So why bother and put expensive after market PE parts in it?
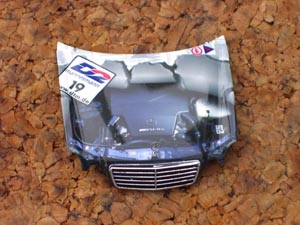
The
hood is an piece of Tamiya art. Paint it and put the decal on it. That's all
there is in my opinion.
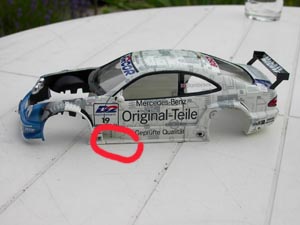
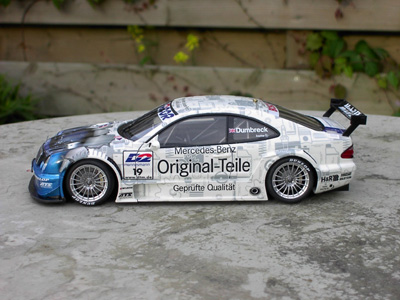
It took me three evenings
of decaling this car, and it is all covered up with decals. Be patient with
these decals and yourself. Take your time and take care the decals go in all
edges and holes.
The red line states an
decal you can't find on the 'applying decals drawing' from Tamiya (I forgot
the decal number). It's position is given at an stage during modeling in the
normal drawing. Keep that decal to be the last decal to put on, otherwise
it won't fit in to decal 21.
Put the extra details
on the car, close it and you have a nice Mercedes CLK/DTM. Detailing is as
you like it. You can do as much detailing as you want.
For me this car was just an 'out of the box' with some extra's.
I did not build it as
an show stopper, but just to have fun. And it looks good. It became Model
of the evening and was second best at an small show.
I like this kit and I
hope you liked this small review about it.
Any questions? Mail me.
Click
here for the Photogallery of the finished model.
The
blue decals on the nose need special attention because they will show the white
paint underneath at some places. Touch it up with some paint. Or better; airbrush
it because there is an color difference between the decals and Tamiya TS-17.
Very well done are the hologram stickers that really finish this car. They are
pre-cutted, but I had to use a sharp knife to cut them out.